Agents Examples and Materials
Agents - Helpful Materials
To assist you in maximizing the capabilities of Agents within the ELITEA platform, we have compiled a selection of helpful materials. These resources are designed to guide you through the processes of creating, setting up, configuring, and effectively using Agents.
Video Tutorials
Explore our curated video tutorials that provide step-by-step instructions and insights on various aspects of working with Agents:
Agent Frameworks
General Guidelines for Both Agent Types
When working with either the React or Raw agent types, it is imperative to adhere to the following general guidelines:
- Toolkit Interaction: Ensure to address the appropriate toolkits (e.g., JIRA, GitHub) and address the specific tools available within these toolkits (e.g., Create issue, Add comments).
- Execution Constraints: Always provide clear instructions or constraints to ensure that each toolkit is executed only once to avoid loops. This is crucial for maintaining efficient and error-free operations.
ReAct Agent Type
For the ReAct agent type, follow these detailed instructions to effectively integrate and utilize various toolkits and tools:
Example: Test Case Generation

### Objective:
You are an expert Software Testing engineer. Your task is to connect to a Git repository using the GitHub toolkit, read files related to "Alita Documentation" to find information about datasources, analyze this information, create three test cases covering datasource creation functionality, and save the generated test cases in a newly created Jira ticket using the Jira toolkit.

### Instructions:
1. Connect to GitHub Repository:
   - Use the GitHub toolkit to connect to the specified Git repository.
   - Ensure you have the necessary permissions to read files from the repository.
2. Read Files:
   - Use the "Read file" tool to read files related to "Alita Documentation" from the repository.
   - Focus on finding information about datasources.
3. Analyze Information:
   - As an expert Software Testing engineer, analyze the information about datasources.
   - Identify key functionalities and requirements for datasource creation.
4. Create Test Cases:
   - Based on your analysis, create three test cases covering datasource creation functionality.
   - Ensure the test cases are detailed, clear, and follow industry best practices.
5. Save Test Cases in Jira:
   - Use the Jira toolkit to create a new Jira Task.
   - Use the following project: ETSTCC
   - The created Issue type must be Task.
   - Ensure the Jira Task has the next available issue ID.
   - Save the generated test cases in the Description field.
   - Use the following Label: AI_Generated.
   - Generate a corresponding Summary and apply it to the Summary field of the Task.
   - Use only standard fields in Jira, do not use neither custom fileds or fields from plugins, they are not available.

### Constraints:
- Execute each toolkit only once.
- Do not get into a loop.
- Provide the best possible output based on the available information.

### Example Test Case Format:
Test Case ID: TC001 Title: Verify datasource creation with valid inputs Description: Ensure that a datasource can be created successfully when valid inputs are provided. Preconditions: User is logged in and has access to the datasource creation page. Steps:

1. Navigate to the datasource creation page.
2. Enter valid inputs in all required fields.
3. Click on the "Create" button. Expected Result: The datasource is created successfully, and a confirmation message is displayed.

Test Case ID: TC002 Title: Verify error message for missing required fields Description: Ensure that an appropriate error message is displayed when required fields are left blank during datasource creation. Preconditions: User is logged in and has access to the datasource creation page. Steps:

1. Navigate to the datasource creation page.
2. Leave one or more required fields blank.
3. Click on the "Create" button. Expected Result: An error message is displayed indicating that required fields must be filled.

### Execution:
- Follow the instructions step-by-step.
- Ensure each toolkit is executed only once.
- Provide the best possible output based on the available information.
Raw Agent Type
For the Raw agent type, adhere to these specific guidelines to ensure the agent operates correctly:
- Preserve Existing Variables: Do not remove any pre-existing variables in the configuration as they are crucial for the agent's functionality.
- Avoid Assigning Values to Variables: Leave variables unassigned; they will be automatically populated during execution.
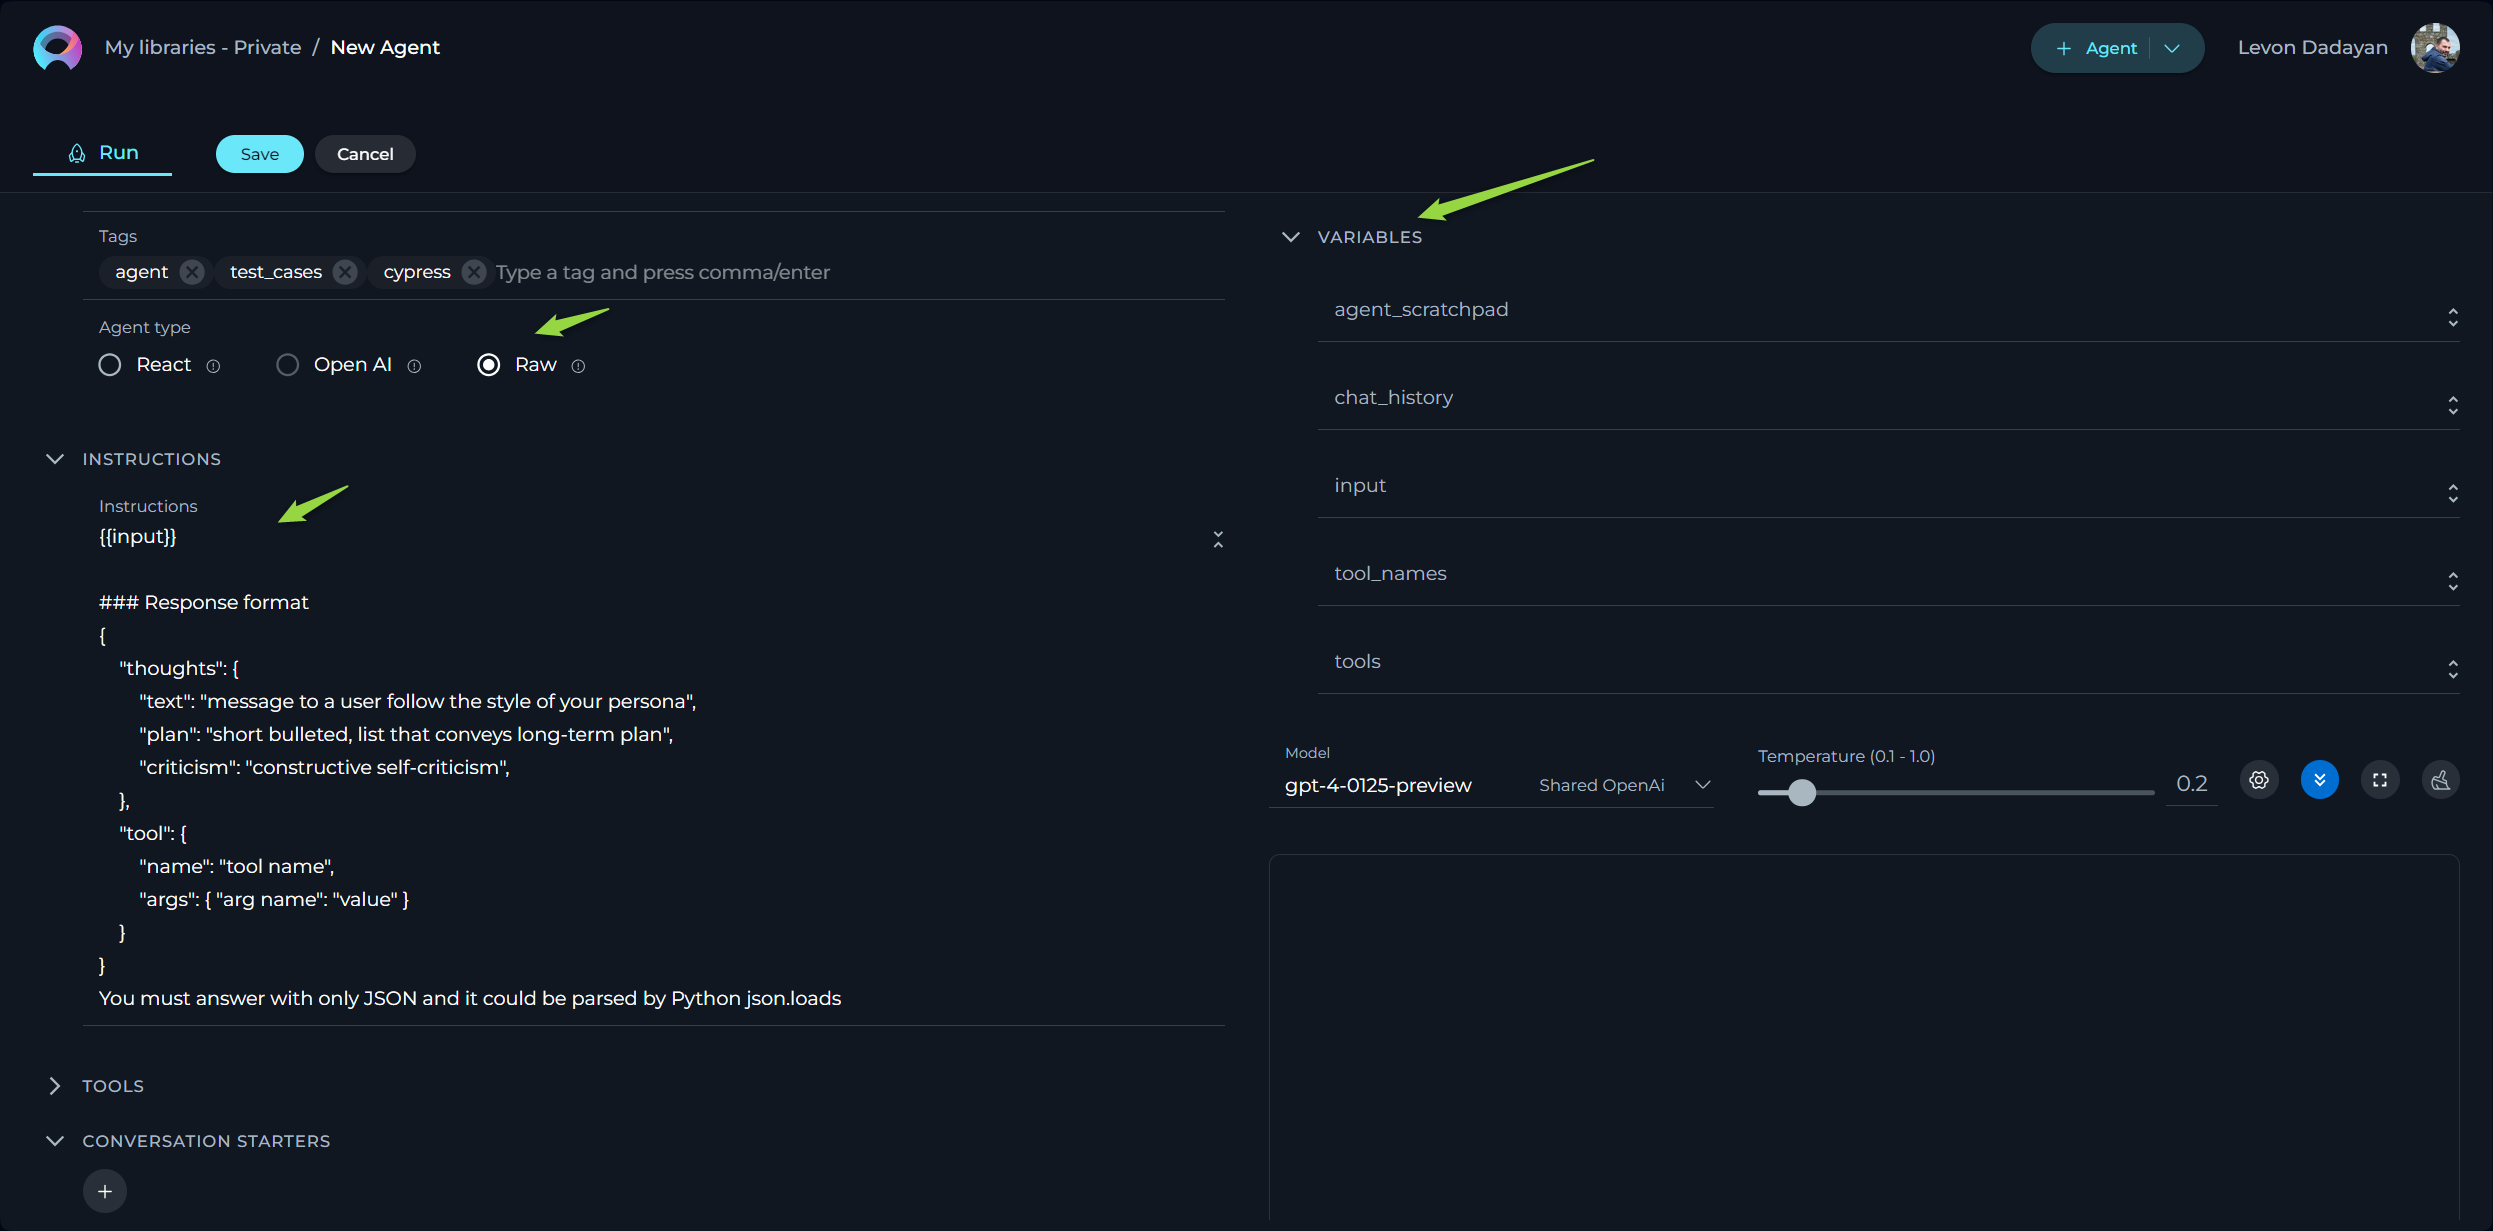
- Include the following essential sections in your configuration:
  ### Tools:
{{tools}}
- Say to user: tool: "complete_task", args: "final_answer"  - complete message to be communicated to the user, shoudl contain as much details as possible

### Scratchpad
{{agent_scratchpad}}

### Chat History
{{chat_history}}

### User Input:
{{input}}

### Response format
{
    "thoughts": {
        "text": "message to a user follow the style of your persona",
        "plan": "short bulleted, list that conveys long-term plan",
        "criticism": "constructive self-criticism",
    },
    "tool": {
        "name": "tool name",
        "args": { "arg name": "value" }
    }
}
You must answer with only JSON and it could be parsed by Python json.loads

By following these guidelines and including the necessary code snippet, you ensure that the Raw Agent functions correctly and integrates seamlessly with the intended processes.
Practical Examples
Gain hands-on experience with our detailed examples that illustrate the practical application of Agents in real-world scenarios: