Collections
Collections menu
The Collections menu within Private workspace and Team projects in ELITEA serves as your central hub for organizing and managing your Collections. Think of it as your personal workspace for curating sets of related Entities (Prompts, Datasources, and Agents), allowing for efficient access, management, and sharing of your AI resources.
Understanding Project Scopes:
- Private Workspace: Your personal and private area within ELITEA to create and manage your Entities and Collections. Only you have access to your Private workspace.
- Team Projects: Collaborative spaces for teams to work together on projects, sharing and managing Entities and Collections. Access to Team projects is controlled by project roles and permissions.
- Public Project: A shared, community space within ELITEA where published Prompts and Collections are available for all users to discover and utilize.
The Purpose and Usefulness of Collections
Collections are designed to enhance your workflow by providing a structured way to group and manage Entities. They offer significant benefits:
- Thematic Organization: Group Entities by themes, projects, or any relevant category for easy access.
- Efficiency: Consolidate related resources, saving time and effort in finding and utilizing them.
- Sharing Best Practices: Facilitate sharing and collaboration by grouping best-practice Entities into easily shareable units.
Accessing the Collections menu
To access the Collections menu, navigate to the main menu sidebar within your Private or Team project and click on "Collections".
Layout of the Collections Menu
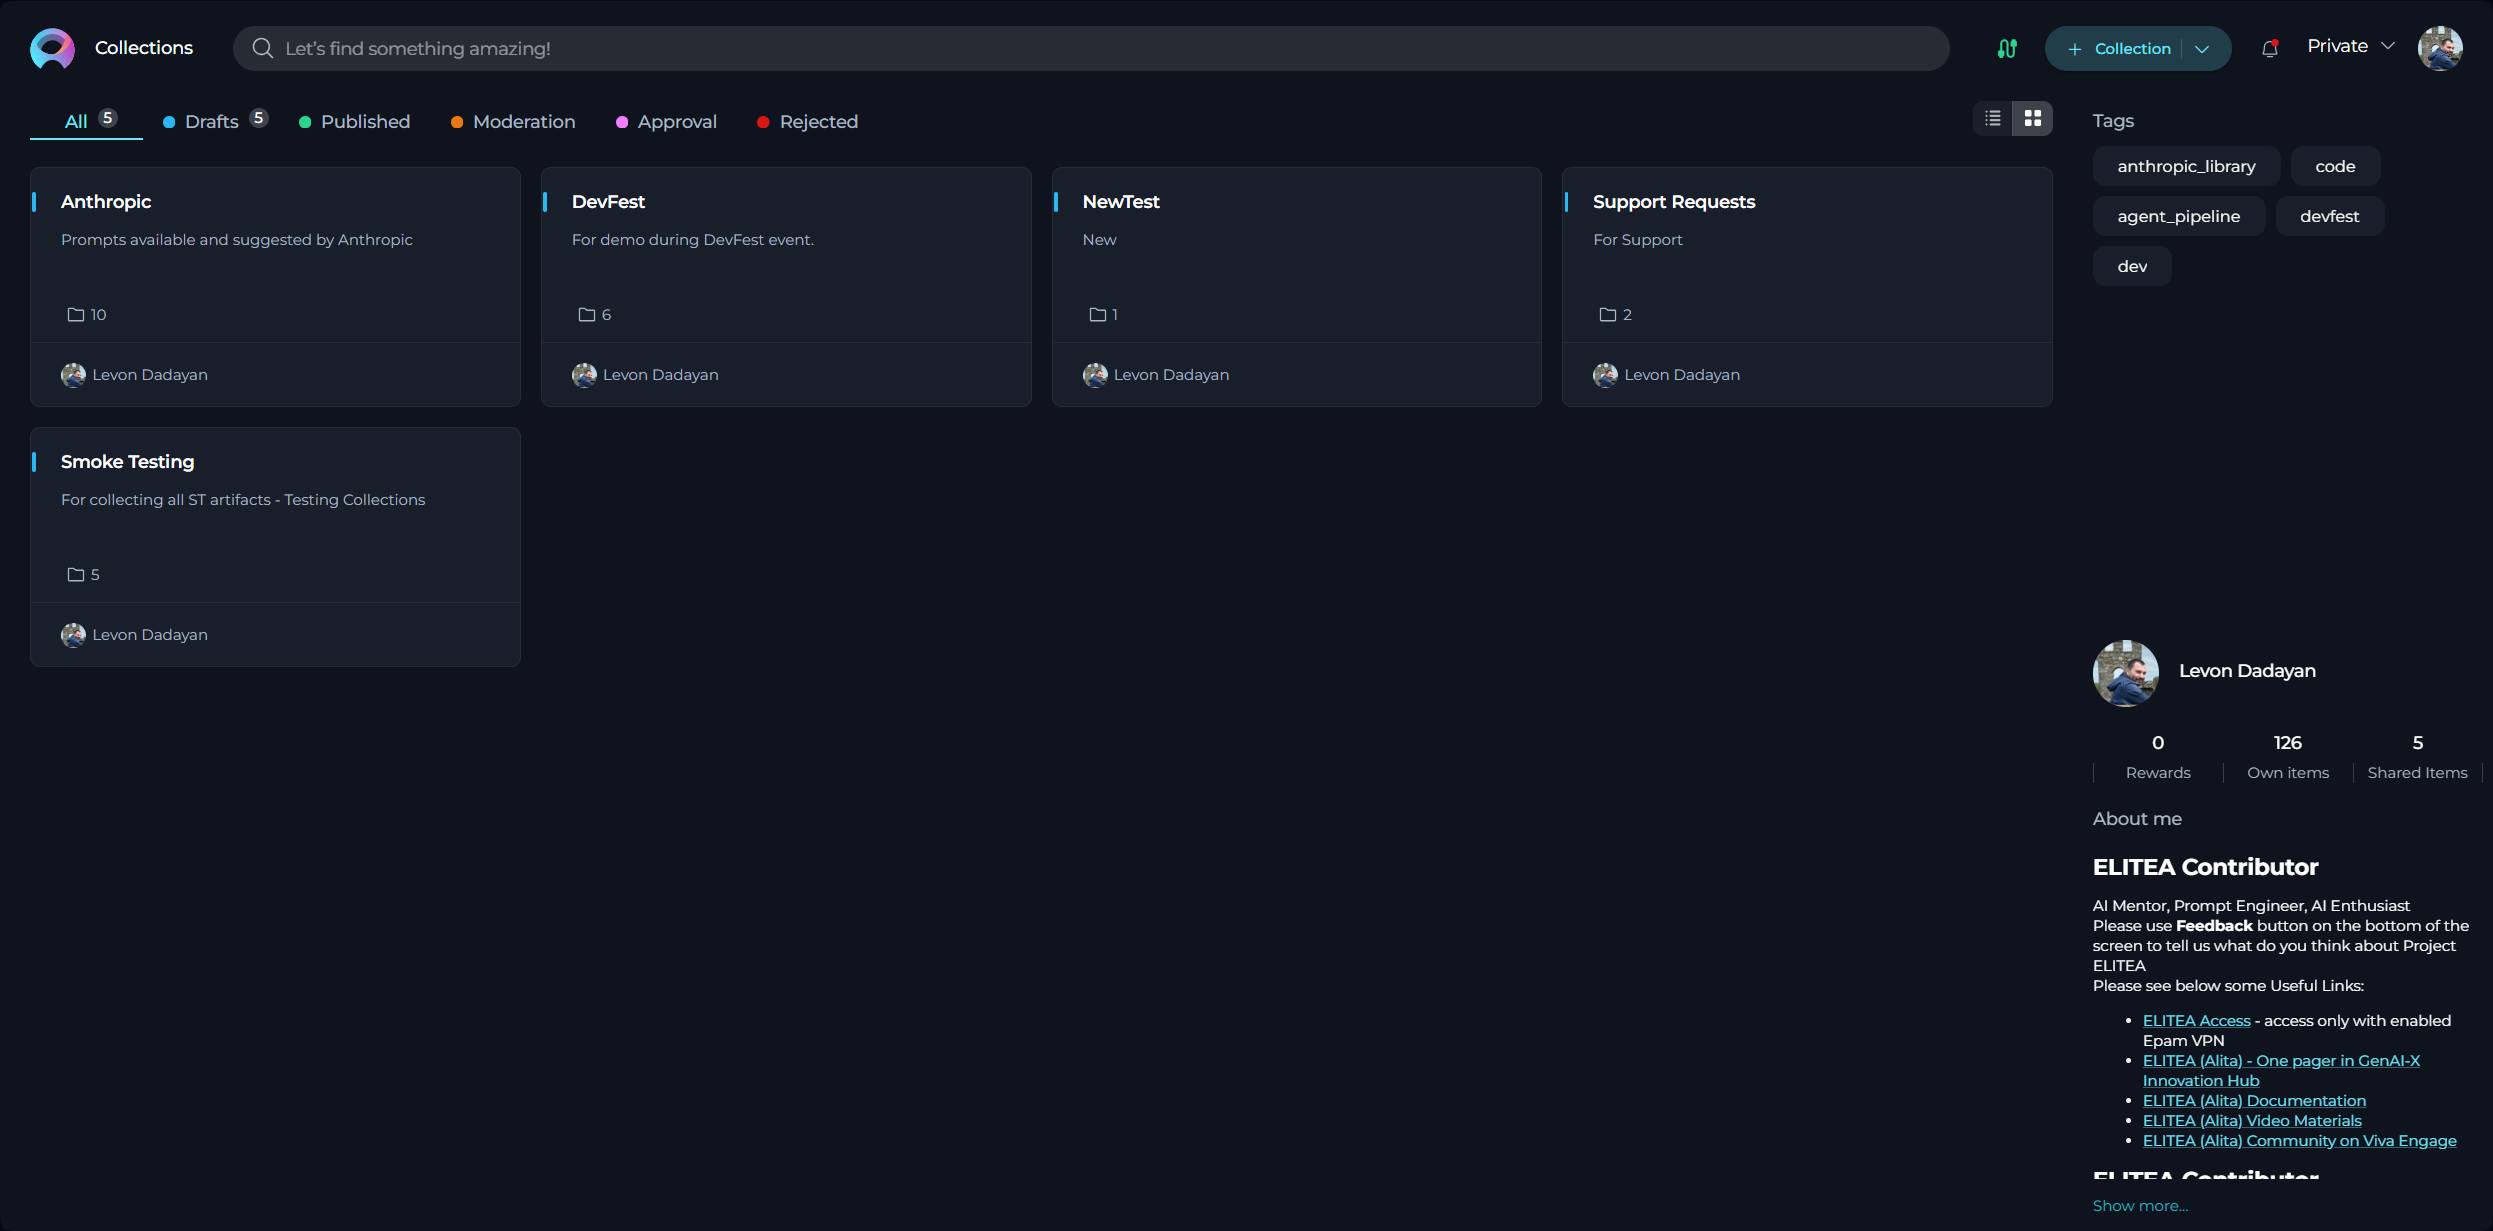
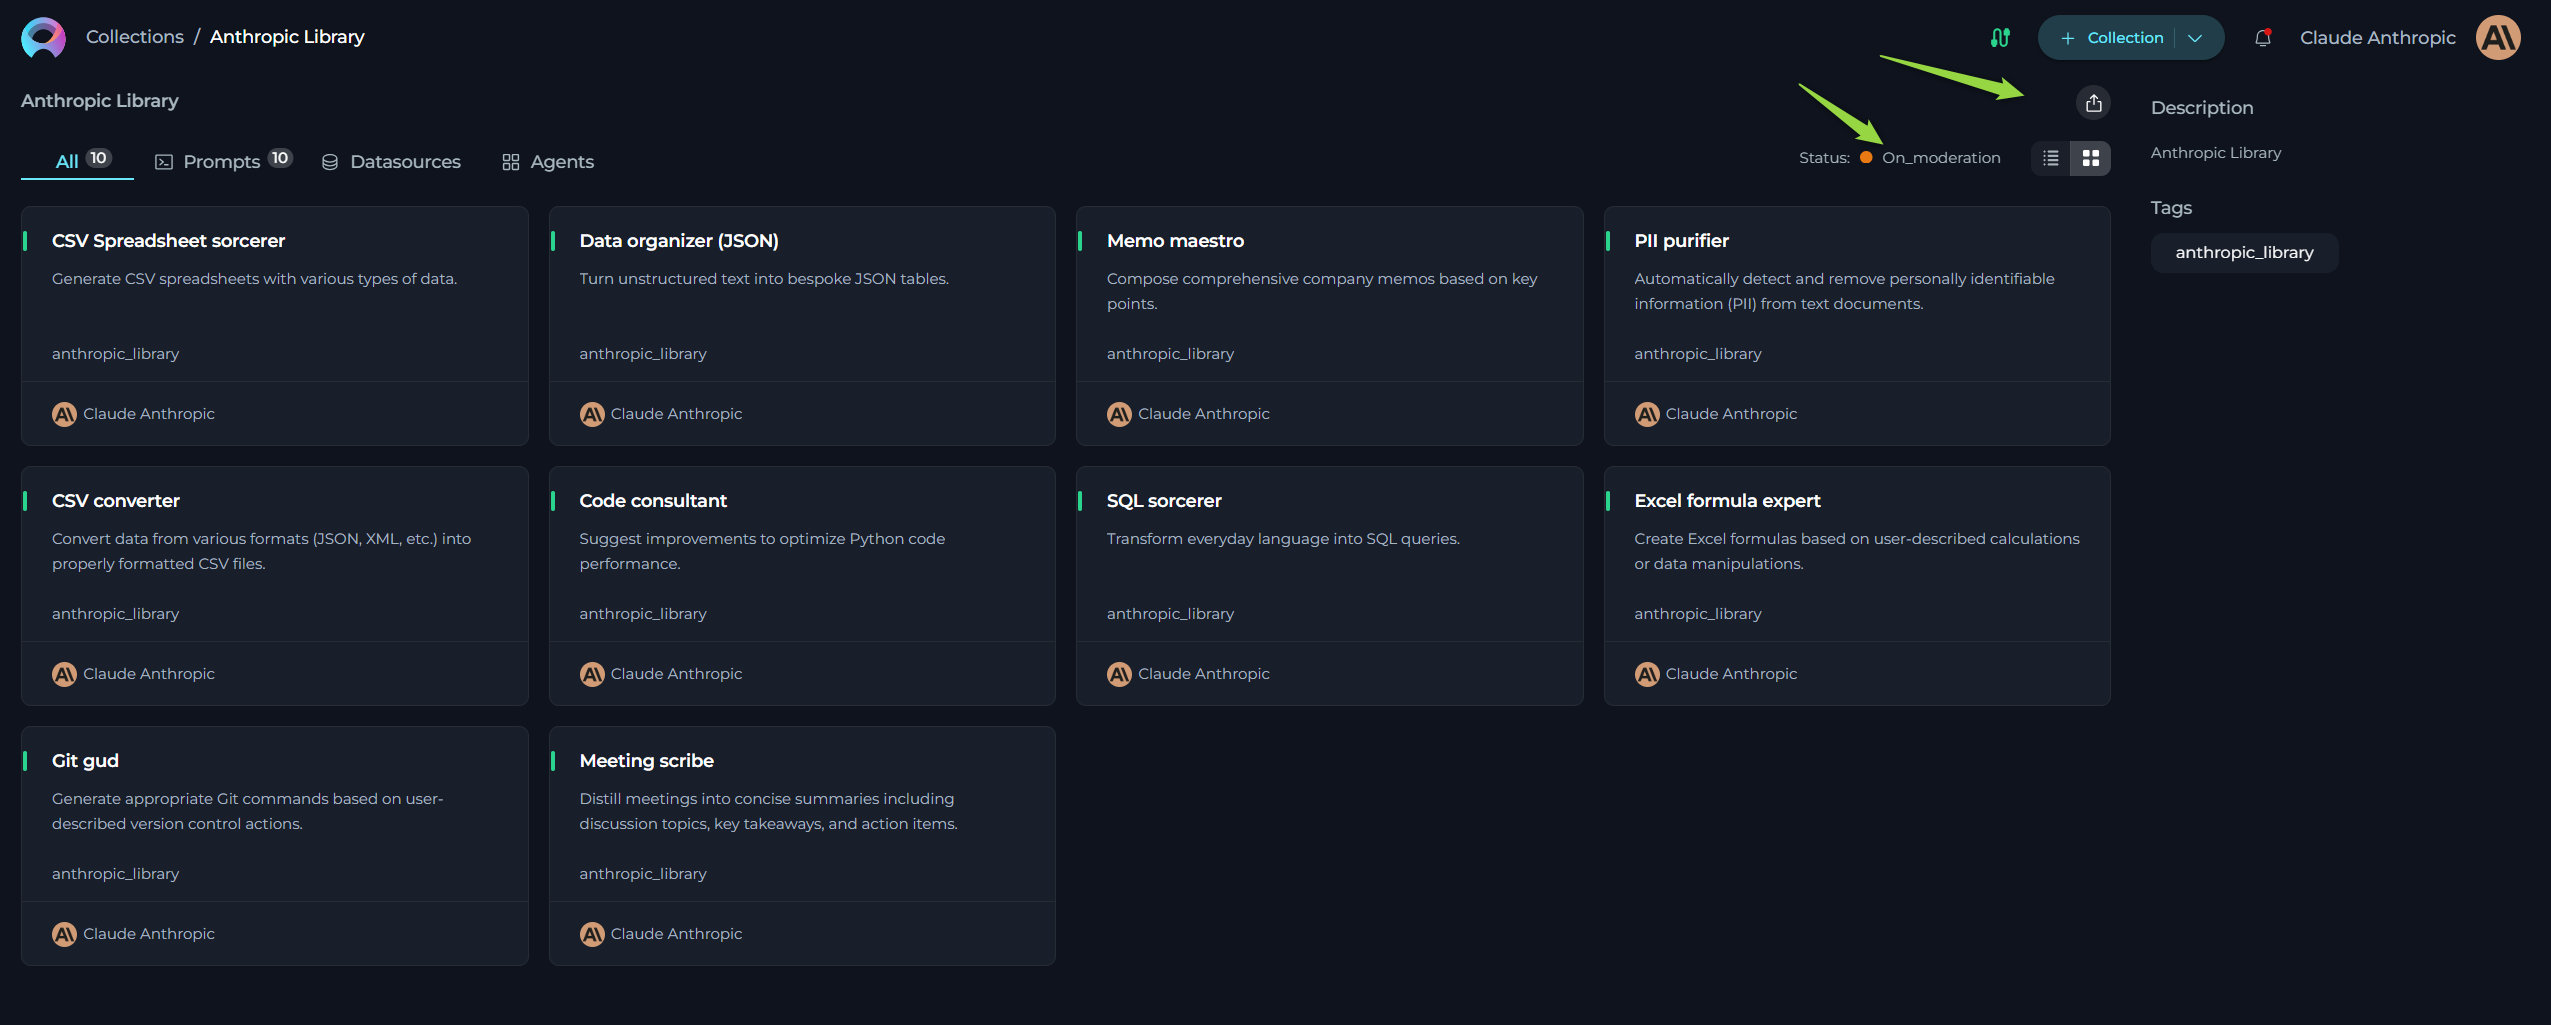
The Collections menu presents your collections in a visually organized layout, typically using a Card List View as shown in the image above. Key elements of the Collections Menu interface include:
- "+ Collection" Button: Located at the top right corner, this button allows you to create new collections.
- Search Bar: Positioned at the top left, the Search bar enables you to quickly find specific collections by name or description.
- View Options: Icons for toggling between different view formats (e.g., Card list view, Table view) may be available, allowing you to customize how collections are displayed.
- Collection Cards: Each collection is represented by a card, displaying:
- Collection Name: The user-defined name of the collection.
- Collection Description: A brief description of the collection's purpose (if provided).
- User Avatar: The avatar of the user who created the collection.
- Action Icons: Icons for performing actions on the collection (Edit, Publish, Delete, Export).
Creating a New Collection
Creating a collection allows you to organize and categorize your Entities for better accessibility and management. Follow these steps to create a new collection:
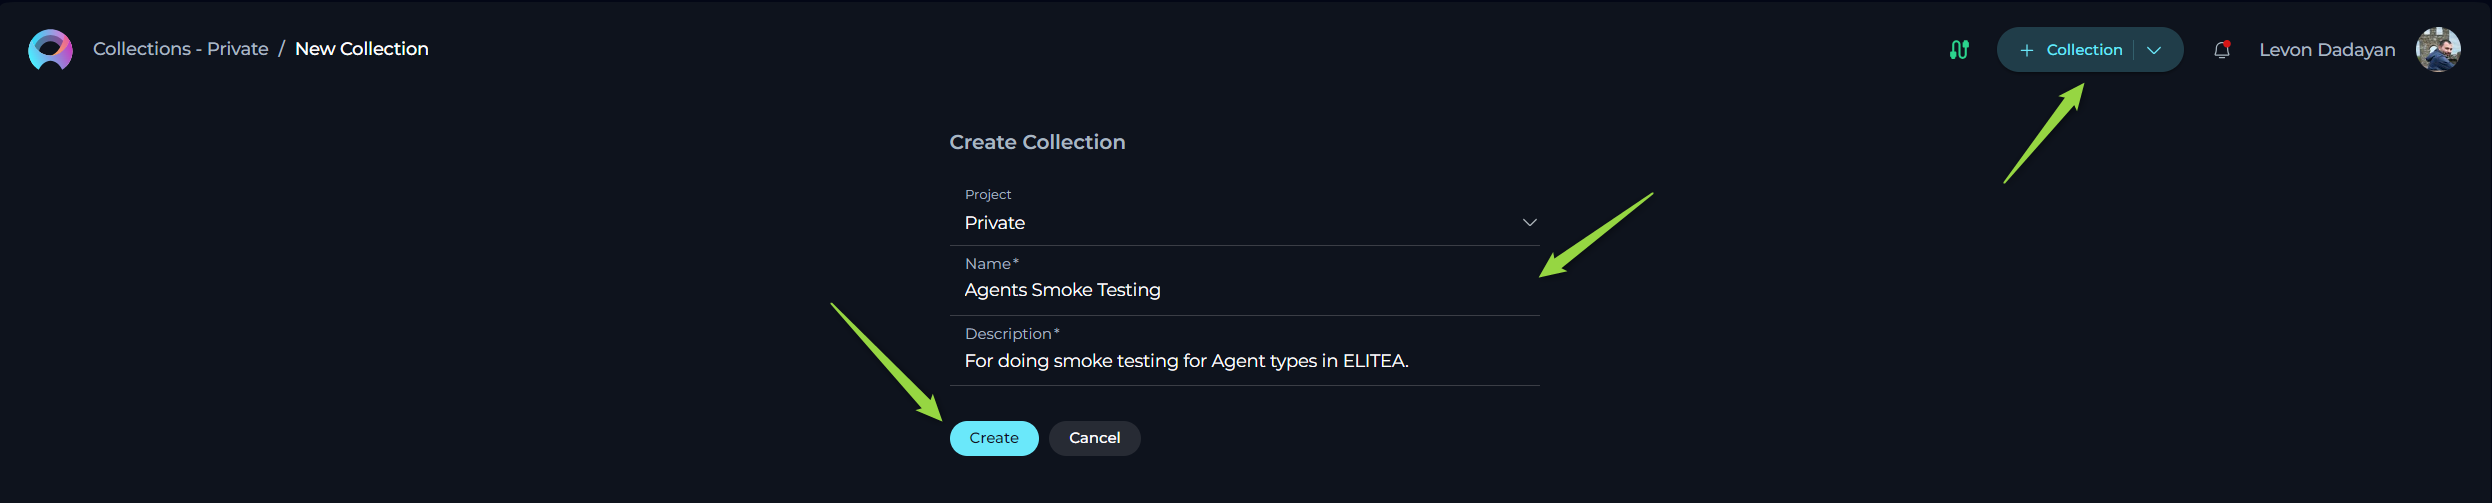
- Create New Collection: Click the "+ Collection" button located at the top right of the Collections menu.
- Define Collection Details: In the "Create Collection" dialog:
- Name: Enter a descriptive Name for the collection.
- Description: Write a concise Description explaining the collection's purpose.
- Create Collection: Click Create to create the collection.
Exploring Collections and Viewing Entities
Exploring collections is straightforward and insightful:
- Open Collection: Click on a Collection Card or Name to view its contents.
- View Entities: Explore the list of Prompts, Datasources, and Agents within the collection.
- Interact with Entities: Within a collection, you can perform the following actions on individual Entities:
- View and Open Entities: Click on Entity cards to view their details and configurations.
- Add to Collection: Use the Bookmark icon on Entity cards or in the Actions menu to add Entities to other Collections.
Filtering Entities within a Collection
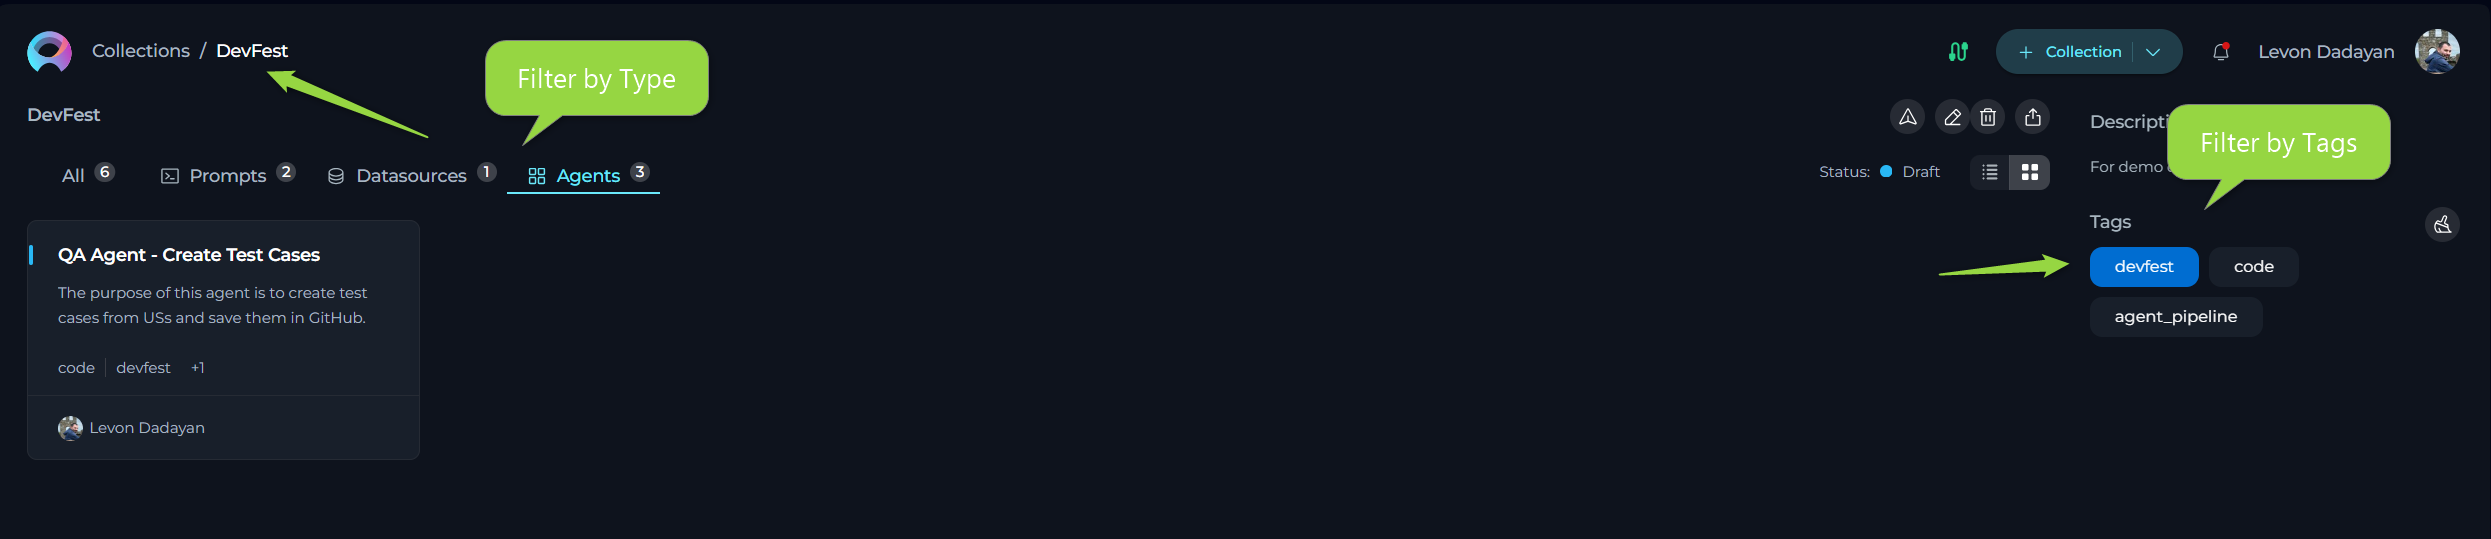
Within the Collection Detail View, you can filter Entities for easier browsing and management:
- Filter by Type using Tabs: Use the All, Prompts, Datasources, and Agents tabs at the top of the Collection Detail View to view specific entity types within the collection.
- Filter by Tags: Use the "Tags" filter section, typically located on the right side, to narrow down the displayed list to Entities with specific tags.
Modifying a Collection
To modify an existing collection:
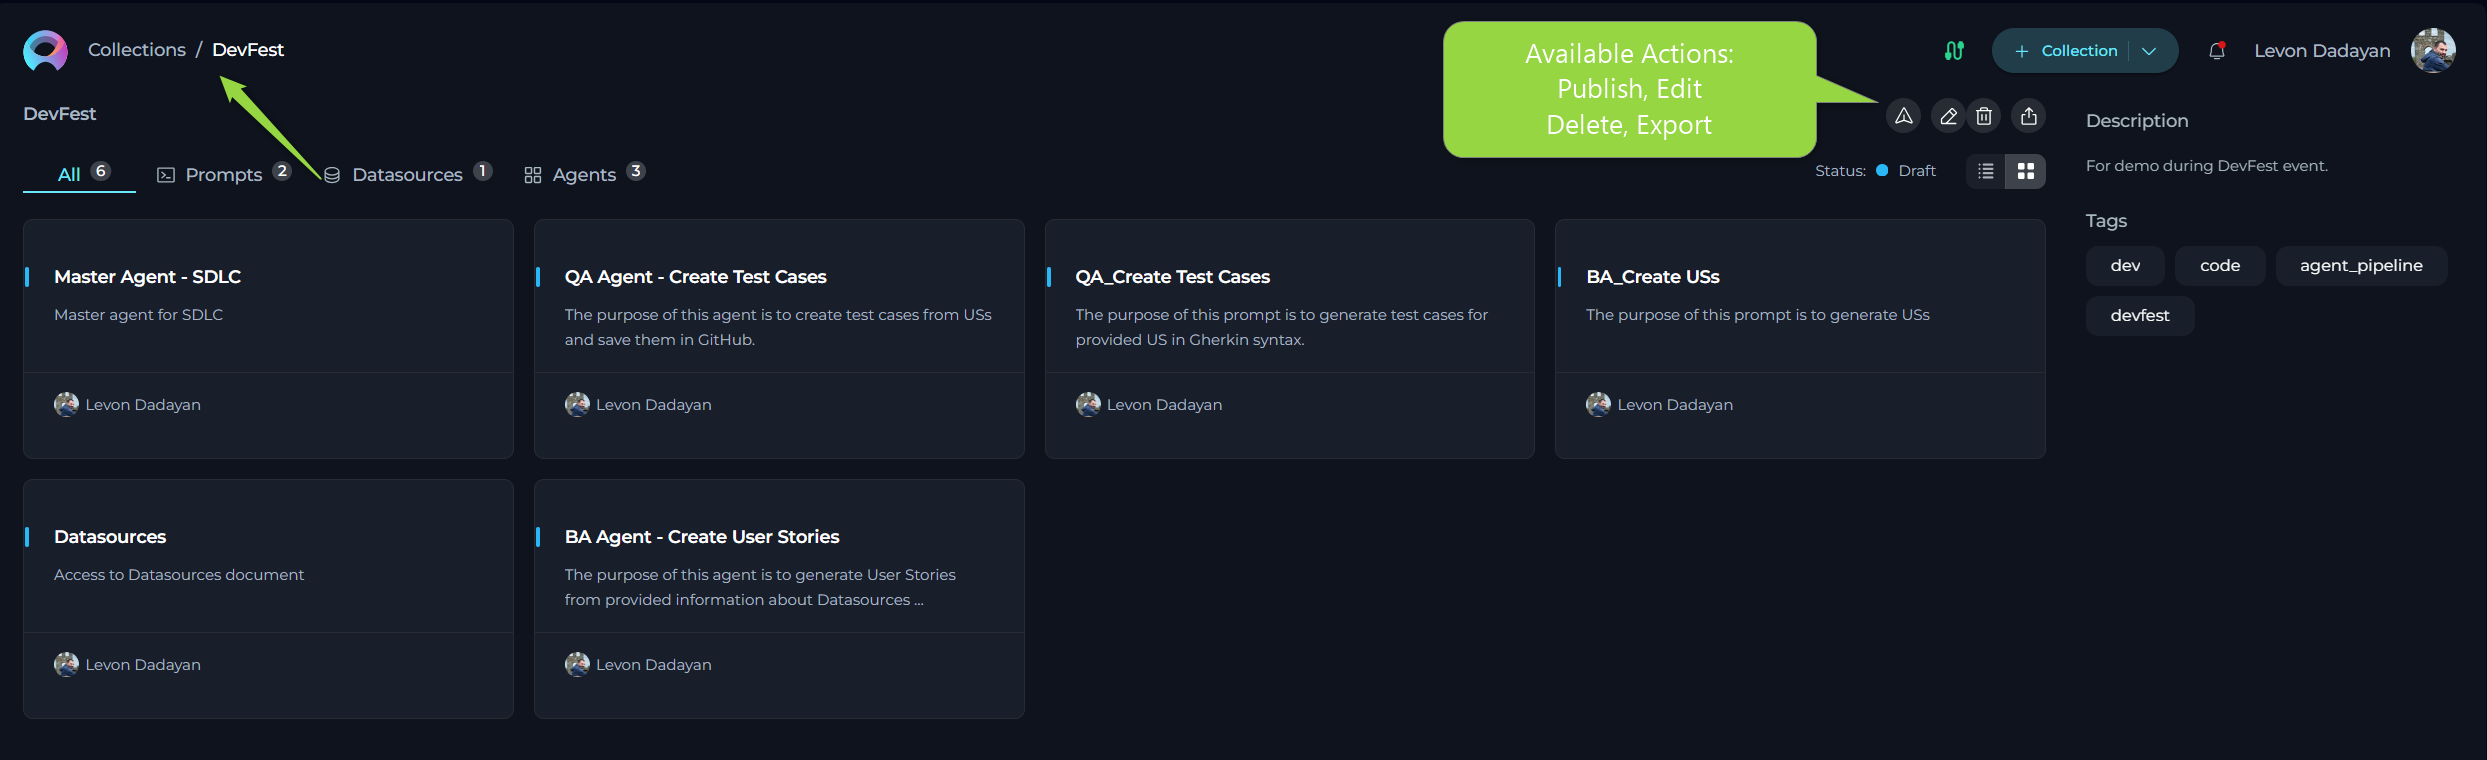
- Edit Collection Details: Click the "Edit" icon on the Collection Card or within the Collection Detail View.
- Update Information: Modify the Name and/or Description in the "Edit Collection" dialog.
- Saving Changes: Click the "Save" button to apply your changes.
Publishing a Collection (Public Project)
To publish a collection to the Public Project:
- Open Collection Detail View: Navigate to the Collections menu and open the collection you want to publish.
- Review Collection Contents: Ensure the collection is complete and contains at least one published entity.
- Publish Collection: Click the "Publish collection" icon within the collection detail view.
- Moderation and Approval: The collection will be submitted for moderation and, upon approval, published to the Public project.
Deleting a Collection
To delete a collection:
- Locate Collection: Find the collection you want to delete in the Collections menu.
- Delete Collection: Click the "Delete" icon on the Collection Card or within the Collection Detail View.
- Confirmation: Confirm the deletion when prompted.
Exporting Collections
Exporting a collection allows you to save it as a JSON file for backup or sharing:
- Open Collection Detail View: Navigate to the Collections menu and open the collection you want to export.
- Export Collection: Click the "Export Collection" icon within the collection detail view.
- Download JSON File: A JSON file containing the collection data will be automatically downloaded to your device.
Importing Collections
Importing collections allows you to add pre-built collections from JSON files:
- Import Collection: Click the "Import" button in the Collections menu.
- Select Collection File: In the "Import Wizard," select the JSON file from your device.
- Configure Import Options: Choose the target project and select Entities to import in the Import Wizard.
- Start Import: Click the "Import" button to import the selected Entities.
- Locate Imported Entities: Find the imported Prompts, Datasources, and Agents in their respective menus.
Important Note: The Collection entity itself is not automatically recreated during import.
For more information about importing collections and entities, please refer to the Export and Import Guide.
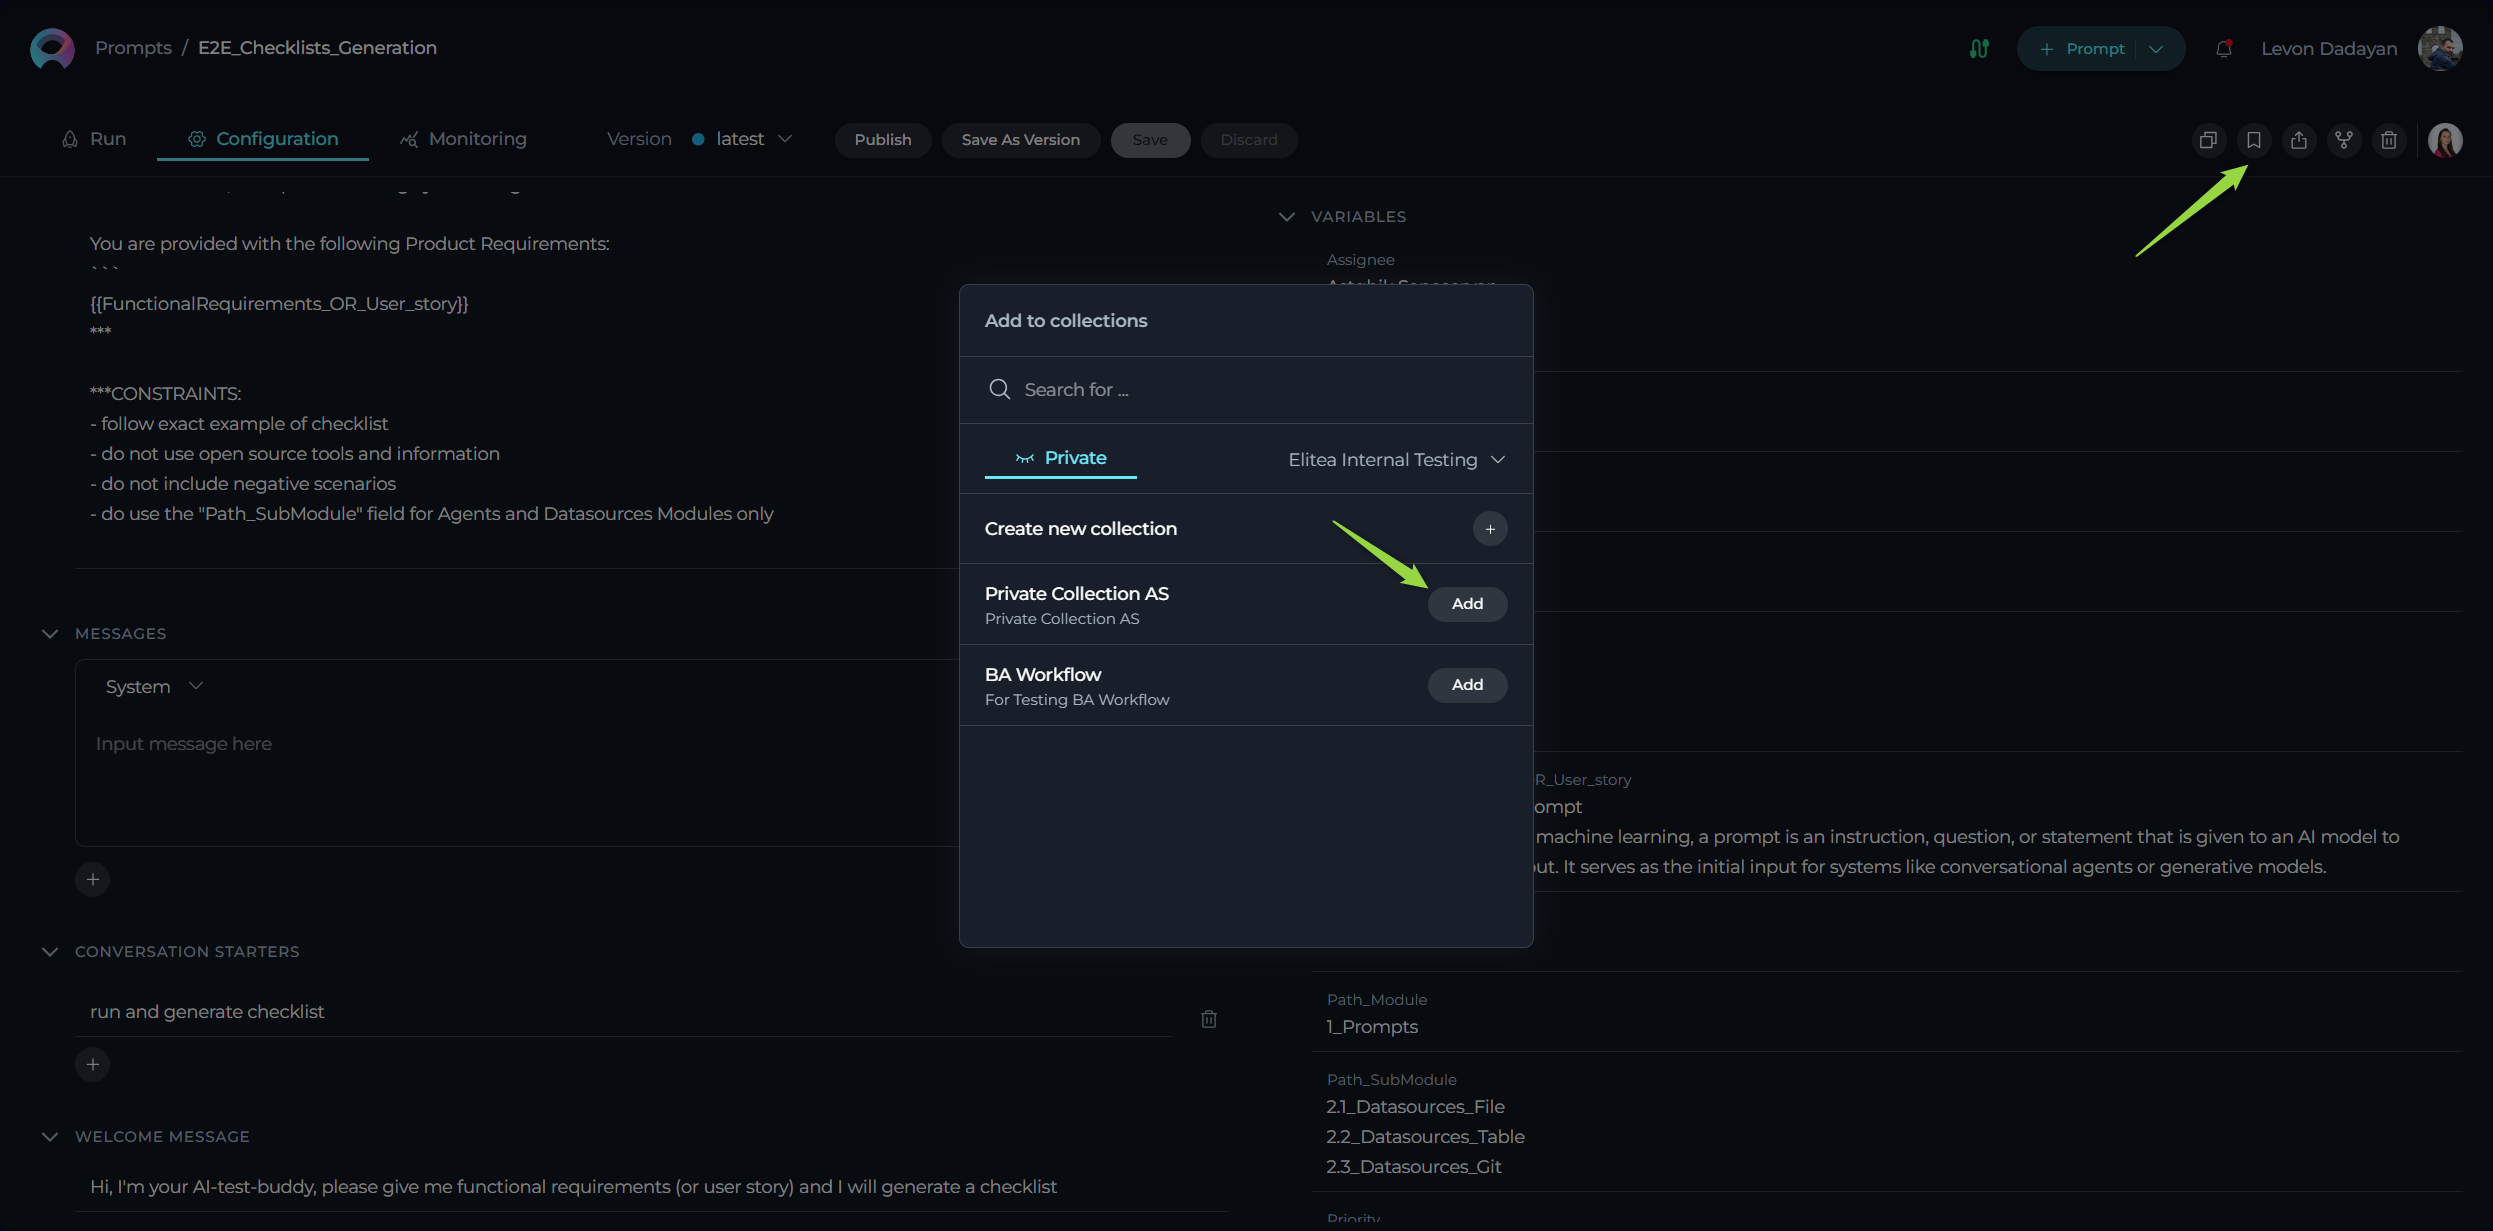
How to Add an Entity to a Collection
ELITEA offers a convenient Bookmark icon to add Entities to Collections directly from the Entity menus:
- Navigate to Entity Menu: Go to the Prompts, Datasources, or Agents menu.
- Locate the Entity to Add: Find the Entity you want to add to a Collection.
-
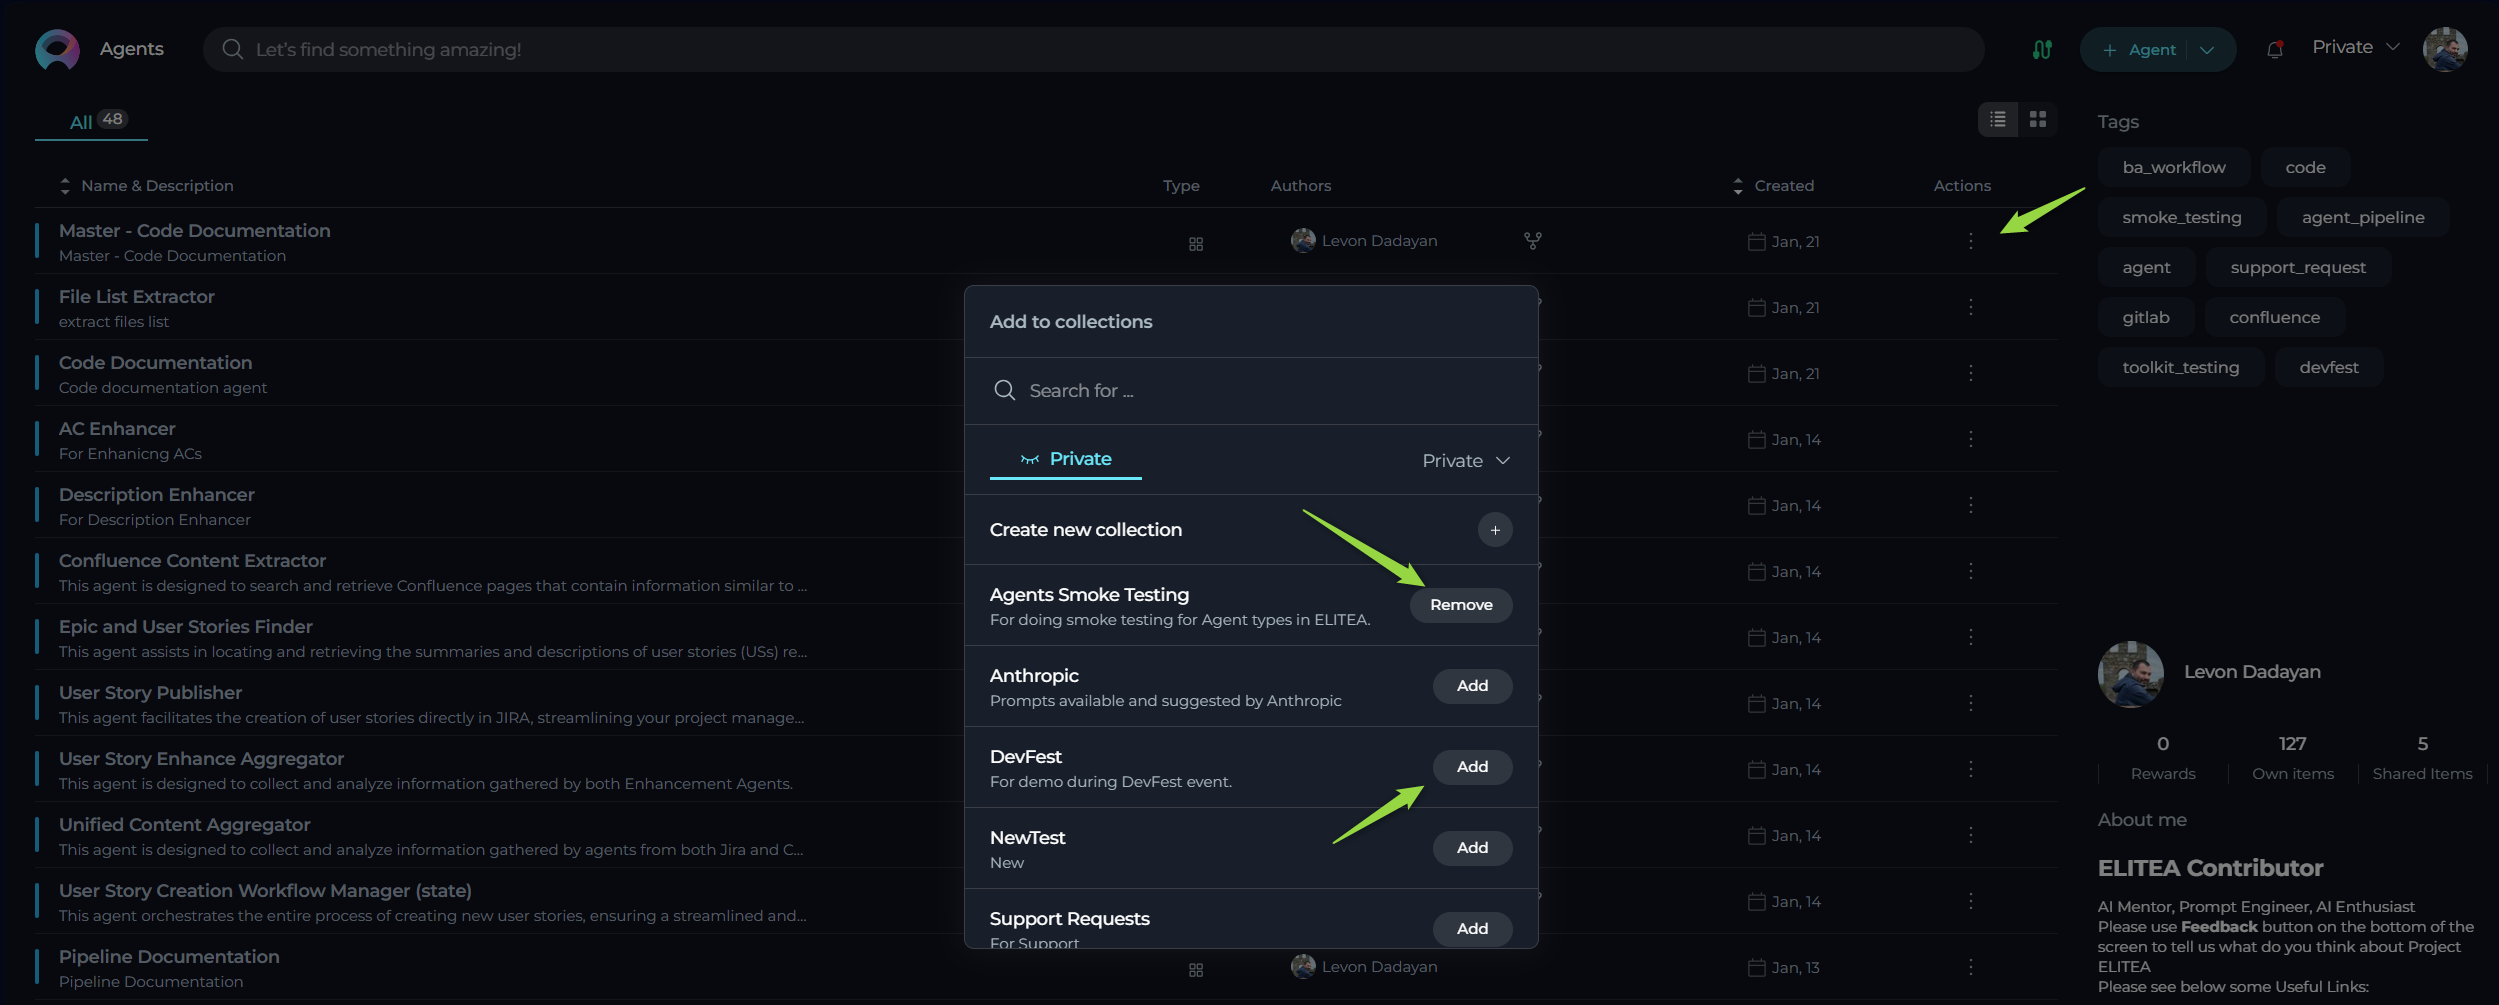
Click the Bookmark Icon: Click the Bookmark icon associated with the Entity:
- Card List View: Top right corner of the Entity card.
- Table View: "Add to collection" option under the ellipsis icon (
...) in the Actions column.
-
Select Target Collection: In the pop-up window, choose the Collection to add the Entity to.
- Entity Added: The Entity is automatically added to the selected Collection.